A Glutton With Brains

"A gourmet is just a glutton with brains." Philip W. Haberman Jr.

Wednesday, March 24, 2010

Chicken Soup

Over the years, I have made many attempts at making chicken soup. The first was right after I moved out on my own. I had roasted a chicken, which went successfully, and wanted make soup with the leftovers. It went well until I added about 2 or 3 cups of rice and it absorbed all of the stock and I was left with chicken-y rice. Several times, I cooked all of the vegetables with the stock and used them in the soup. I wouldn't say it was bad but after boiling that long the vegetables lose all of the their flavor to the broth.

This particular version is particularly delicious, if I do say so myself. This is the kind of chicken soup I crave. The kind that cures a cold and warms your soul. It's comforting and reminds me of being home.


Chicken Soup

1 leftover chicken and any extra meat

1 onion, quartered

5 cloves of garlic, smashed

6 small carrots, peeled and halved

A handful of fresh dill

4 celery stalks, halved

Fresh ground pepper

Salt

1/2 lemon


1. In a large stock pot, combine chicken, onion, garlic, 3 carrots, dill and 2 celery stalks in a large pot. Fill with enough water to cover everything. Grind fresh pepper on top, cover and bring to a boil.

2. Once boiling, reduce heat to a low simmer. Let simmer for one hour. Taste the broth and salt to taste. Because there is already salt on the leftover chicken, it's good to wait and see how salty the broth is from the chicken. Otherwise, you may over salt.

3. Squeeze juice from lemon into broth. Continue to simmer for another hour. Taste and make any adjustments necessary (salt, pepper).

4. Using a slotted spoon, transfer all solids to a colander and reserve broth. Discard any vegetables or herbs. Separate meat from bone and return any meat to the broth.

5. While you are separating the chicken, let the broth stand on very low heat. The fat will separate from the broth and you can use a spoon to skim it off the top.

6. Slice remaining carrots and celery into discs and add to broth. Let simmer for about 20 minutes, until carrots and celery are soft. Serve and garnish with chopped dill.


Monday, March 22, 2010

Spring and Roasted Chicken


Last week, after a serious, several day storm, we were blessed here in New York with a few nice, warm, sunny days. It started to look like Spring. Something about that warmer weather made me crave roasted chicken. So for St. Patrick's Day, I made J and I a roast chicken. I considered making something more in the holiday spirit but J said that the reason Irish people eat things like corned beef and cabbage on St. Patrick's Day is to remind them of how bad everything was, including the food, back in Ireland and how lucky they are to be living in America. So instead of trying to make something Irish, I made something spring-y. Though we didn't delight in all of the wonderful things about Irish cuisine, we enjoyed our chicken very much.

This chicken is so easy to make and wonderfully delicious. Not to mention, chicken is very budget friendly. One chicken will get you at least 2 meals. I made soup with the leftovers (next post). Many recipes will instruct you to truss the chicken, however I find that with such a small chicken, it's really unnecessary. Simply tuck the wings under the chicken. Though I'm sure you already know this, my days spent in class learning about food safety make me feel compelled to remind you to be extra careful with raw chicken. Wash your hands before touching anything else and sanitize anything that touched the raw chicken.


Roast Chicken

1 5lb whole chicken (giblets removed)

2 pads of butter

2 TBS olive oil

salt and pepper

2 sprigs of fresh rosemary

1 lemon, ends trimmed off

6 cloves garlic


1. Preheat oven to 375 degrees.

2. Wash and pat dry the chicken, making sure all giblets are removed from the cavity.

3. Separate the skin from the flesh of the chicken and spread the butter on the flesh. You can simply place the butter between the skin and flesh and then move it around by pressing on the skin to spread it.

4. Rub olive oil all over the skin with your hands. Salt and pepper.

5. Place rosemary, lemon and garlic inside of the cavity.

6. Place in a roasting pan and tuck wings under the body.

7. Roast in oven for about 20 minutes. Using a spoon, gather any drippings and pour over the top of the chicken to keep the meat moist. Return to oven for an additional 20 minutes, until the chicken reaches over 165 degrees temperature on a meat thermometer. Let the chicken rest for about 15 minutes before carving.


Save the carcass for soup (recipe next post) or chicken stock.


Thursday, March 18, 2010

Malted Blondies

So I kind of have a thing for baked goods. It's really an intense sugar addiction. However, not just any sugar will do. I never crave a Snickers bar or processed cookies in a package. No, I prefer things that require more effort than that. I find that baked items I purchase are usually disappointing. I don't eat sugary foods for the sake of it, processed goods are not worth it. I guess I'm just high maintenance. I usually make various breads like banana bread, zucchini bread and pumpkin bread. But lately I've been interested in various bar type goods like the Toblerone brownies I made a few weeks ago. These are much lighter and not as rich as the Toblerone brownies were. Blondies are a nice alternative to brownies once and a while. These Blondies are malted, they have whoppers and malt powder. I think next time I would add more malt powder to really bring that flavor out more but the recipe below is how I made them.

Malted Brownies
adapted from "Baked: New Frontiers in Baking"

2 1/3 cups all purpose flour
1 1/2 tsp baking powder
1 tsp salt
2 TBS malted milk powder ( you could try with a little more if you like malt)
14 TBS unsalted butter, softened, cut into 1 inch cubes
1 3/4 cups packed dark brown sugar
2 large eggs
2 tsp pure vanilla extract
3/4 cup malted milk balls, chopped
3/4 cup (9 0z) semi sweet chocolate chips
3/4 cup toasted walnuts, chopped


1. Preheat oven to 350 F. Butter or grease the bottom and sides of a 9x13 pan.


2. In a medium bowl, mix flour, baking powder, salt and malted milk powder.


3. In the bowl of an electric mixer fitted with the paddle attachment, beat the butter and brown sugar on medium speed until completely combined. Scrape down bowl, add eggs and vanilla, beat until combined.


4. Add the flour mixture in two batches and beat until just combined. Add the malted milk balls, chocolate chips, and walnuts. Beat until just combined. The mixture will be thick. Turn the mixture out into the greased pan and use a spatula to spread it evenly.


5. Bake in the center for about 25-35 minutes, until a tooth pick comes out clean.


6. Let cool completely before cutting. These would be great with some ice cream and are delicious warm.


Procrastination and A Sample Sale

I have been working at a Dolce and Gabbana sample sale for the past week which is why I haven't posted anything new for a while. It was an exhausting experience but I'm really glad I did it. I was in a coat check room for most of it, 12 hours per day. I was reminded why I do not work in a customer service job. Because of the nature of the event, selling very high price designer items at a discount, customers were not permitted to bring in bags, jackets or umbrellas in an effort to prevent theft and damage to the products. To be fair, about 25% of people just handed over their belongings without complaint. The rest, though, complained, yelled, and just got generally nasty. I'm not exaggerating. One woman actually started screaming at a security guard who was calmly telling her that if she wanted to go in, she had to check her things. She eventually did but not before yelling at everyone in the hallway at the top of her lungs. My favorite was when she yelled "You need to behave yourself" at the security guard, I thought it was pretty funny and starting laughing at her ridiculousness. Some people just flat out refused to check their things. At first, I calmly explained to them that no one is allowed in with bags or jackets. By the second day, when I had a line of over 100 people outside waiting to get in, I started saying "The elevator is behind you, have a nice day. Next." At which point most of them relinquished and checked their belongings. When people were leaving, I would grab their jacket first to give them a chance to put it on while I grabbed their bag. Most of them would say "Um...I have a bag" with that snotty entitled tone so many of them had. Finally I just snapped at some woman who had 4 shopping bags, a purse, jacket and umbrella, "I only have two hands, you're going to have to give me a second." This whole experience shattered any ideas I once had about the kindness of humanity. This all may have been bearable if people were tipping, but very very few were. At one point a man pulled out a couple dollars to tip us and his girlfriend pushed his hand down and said "You don't have to tip them." Where did people get this idea? I am unemployed, I make no money. But still I tip my barista, cab drivers, coat check girls, everyone. The difference I have decided is circumstance. It can be assumed that if people are buying t-shirts that are $400 (after discount) they have probably never worked as a waiter, barista, etc. and therefore have no appreciation for the institution of tipping. Having worked many jobs where I depended on tips, I always tip for good service. Even mediocre service. Heck, I even tip for bad service, albeit less, but I still tip. One woman came out and was excited that she had bought 4 items for only $1200. Really? $1200.00??? I understand that at retail those items would have cost her closer to $8000 but $1200 is still a lot of money. The sample sale certainly draws a very interesting, privileged bunch.

I am sorry I haven't posted for so long. After standing for 12 hours and interacting with some of the rudest New Yorkers, I was in no mood to sit down and write a blog post. Most days I came home, showered and passed out. Now, I'll be back to my regular posting. Thank you for reading.

Sunday, March 7, 2010

Tomato Soup


We've had a very interesting winter here in New York. Not even two weeks ago, we were hit with a huge storm that left the city covered in snow. Now, it's sunny and about 55! I'm not complaining, mind you. So even though it's not quite summer yet and tomatoes won't be in season for a few months, I couldn't resist the big beautiful tomatoes at Costco last time I went and bought 5lbs of them. Sometimes I wonder what motivates some of my purchases but I know that they are usually driven by some kind of deal. $8 for 5lbs of tomatoes? That was one bargain I couldn't pass up. However, J and I live alone. 5lbs of tomatoes is a lot for only two people. I thought of making pasta sauce, but we've had a lot of pasta in these past few cold months and shorts and tank top weather is quickly approaching. So I made some delicious tomato soup instead. What really sets this tomato soup apart from other ones is the lemon and rosemary cream. It gives it a hint of sophistication and grown-upness. This isn't the Campbell's you had as a kid. Plus, the cream really doesn't add too much fat, because you really only need a small dollop. This recipe also uses a little bit of dried red chili flakes which gives it just the slightest hint of spiciness. I recommend making the cream first, even a few hours ahead of time so that the lemon and rosemary have a chance to infuse into the cream.


Fresh Tomato Soup with Lemon and Rosemary Cream
adapted from epicurious.com

1/2 cup whipping cream
1 tablespoon minced fresh rosemary
zest from 1 lemon

1/4 cup butter (1/2 stick)
1 onion, diced
3 garlic cloves
1 tablespoon fresh rosemary, finely chopped
1/2 teaspoon dried crushed red pepper
1 bay leaf
2.5 lbs of tomatoes (or 56 oz canned tomatoes)
6 cups low salt chicken broth


1. combine minced rosemary, cream and lemon zest in a small, sealable container. Whip with a fork for about 1 minute, until whipping cream just begins to thicken and froth. Cover and chill.

2. Melt butter in a heavy, large saucepan over medium heat. Add onion, garlic, rosemary and crushed red pepper. Cook about 5 minutes, until onion is tender.

3. Add tomatoes, bay leaf and broth. Season with salt and pepper. Cover and simmer for about 40 minutes.

4. Discard bay leaf. Puree with immersion blender or transfer in batches to a blender. Can be made ahead and reheated. Serve with a drizzle of lemon rosemary cream.

Friday, March 5, 2010

Eggplant Bharta

Since my Freshman year in college I have gone through periods of vegetarianism. It all began with a few peta videos I had to watch for a class. I've had a complex relationship with meat ever since. Because of this, I have survived the last several years largely on tofu and eggplant. I know there are a lot of people who aren't crazy about eggplant but I've decided that if this is the case, you've probably had undercooked eggplant. Eggplant is terrible when it's not prepared well. Mainly, if it's not cooked all the way through. A half cooked eggplant is just nasty. I find this is often the case with most eggplant dishes I've ordered in restaurants. It often comes out undercooked and rubbery. But a well cooked eggplant is divine. It should be soft and luscious not hard and chewy.

Though this recipe comes from that same Ayurvedic cookbook I told you about, it's really a versatile dish. I've used leftovers on sandwiches with some veggies. You can use it like a dip. It goes well with chicken or pasta even. Plus, it's pretty easy. You can broil the eggplants while preparing other dishes.

Fit for a King Eggplant Bharta
from The Modern Ayurvedic Cookbook

2 large eggplants

olive oil to rub on eggplants

2 tbsp olive oil

1 1/2 tsp cumin

1 large onion

1 1/2 tsp fresh ginger, minced

3 medium tomatoes, diced

1 tsp salt


Set oven to broil.


1. Wash and dry each eggplant. Pierce all over with a fork. Coat with olive oil and sprinkle with a little salt. Broil on a baking sheet or broiler pan for about 45 minutes total, rotate halfway through. It will collapse and look mushy when it's ready to come out. Remove from the oven and let cool completely.


2. Make a slit down the center of each eggplant and scoop out the flesh into a bowl. Mash flesh with a fork. Discard peel.


In the meantime
3. In a large frying pan on medium high, heat oil. Add onions and cumin saute until onions are golden, about 5-7 minutes. Add tomatoes and salt. Cook until tomatoes soften, about 4-5 minutes.


4. Add mashed eggplant, reduce heat to medium low and cook for another 10 minutes. Stirring occasionally. Serve hot with rice. Garnish with cilantro for a little extra color.


Tuesday, March 2, 2010

Strengthening Dal


I grew up thinking that I didn't like Indian food. I had this crazy thought in my head that I didn't like curry and therefore, I wouldn't like Indian food. Never mind that I'd never tried curry or Indian food, I just assumed I didn't like it. For the record, there are lots of Indian dishes without curry most in fact do not have curry. When I moved across the country to New York, my culinary horizons expanded drastically. I tried cuisines from all around the world. My international palate before then had been limited to Mexican, Chinese, Thai, Italian and Japanese. I have since discovered that in New York, if there is a group of people in the world that eats, they have a restaurant here.

I have been intrigued by Indian religions and practices for a very long time. My curiosity began with yoga when I went with my mom to her yoga class. I immediately fell in love and I've been practicing ever since. So when I found an Ayurvedic cookbook at a book sale, I immediately bought it. A very abridged version of Ayuveda: It is a healing system. The word comes from Sanskrit and means life science. It includes all aspects of life, including food. Followers aim to balance themselves through their actions and through what they eat. The following recipe comes from that book and this particular recipe is meant to be balancing for everyone. Not only is it balancing, it's delicious.

There are two main parts to dal, the dal and the vagar. Dal is just the lentils and the vagar is everything you put in them to make them taste good. Make sure you turn your fan on high! You'll know you are doing it right when you start coughing. The first time I made this, I didn't have my fan on and I inhaled the smoke from the mustard seed and chilis and I thought I was going to die. I had to hang my head out the window to catch some fresh air. Learn from my mistake! Turn your fan on high before beginning!


Strengthening Tur Dal
adapted from The Modern Ayurvedic Cookbook

Dal:
2 cups dried lentils ( I used green lentils, you can also use yellow lentils or split mung dal)

7 cups water

1 tsp salt

1/2 teaspoon turmeric

1 tsp olive oil

Vagar:
2 tsp olive oil

3 dried red chilies

1 tsp mustard seeds

1 tsp fresh ginger, minced

1 tsp garlic

1 tsp salt

1/2 tsp turmeric

1 tsp ground cumin

1 cup tomatoes, chopped

2 tbsp tomato paste


Dal
1. In a large pot on high heat, combine 7 cups of water and lentils, bring to a boil. Add turmeric, salt and oil. Reduce heat and simmer for 45 minutes. The lentils will soak up all the water as it cooks, much like oatmeal.


Vagar
2. While the lentils cook, in a frying pan on medium-high, heat oil. Add chilies and saute until they turn black. Add mustard seeds and cover immediately. Let them pop for about 30 seconds, until they stop popping.


3. Immediately add remaining vagar ingredients. Saute for about 10 minutes. Let stand with cover on until lentils have finished cooking.


4. Combine the dal and vagar. Serve hot.


Serve with naan, steamed rice, eggplant(recipe tomorrow) and chutney. I used tamarind and mint chutneys.


Monday, March 1, 2010

Toblerone Brownies


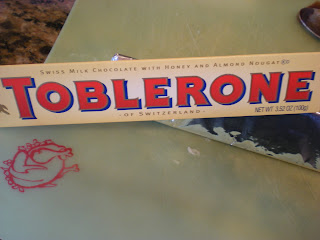
I have a serious crush on Toblerone. It's no laughing matter. Last September I had to take my baby sister to the airport to send her off to Europe for a year abroad. Though I was really excited for her, it was really hard to say goodbye for so long. To cheer me up, J bought me one of those giant Toblerones with five bars inside. A few days later, he asked if he could have a bite of one. I hemmed and hawed for a moment before admitting that in my depression, I had eaten the entire thing. I have since banned Toblerone from the apartment because I know that I cannot trust myself with a Toblerone bar. This morning I found a cookbook for 2.99 on the discount shelf called "The Best Bakesale Ever Cookbook". Of course I had to buy it. Though I thought the title was cute and the pictures looked appetizing, what really caught my eye was the recipe for Toblerone Brownies, sold.

I was tempted to buy an extra Toblerone bar, you know for later, but I refrained. These brownies are rich and delicious, definitely not for the faint hearted. I already ate two...then spent an hour in the gym. Tomorrow I will be sending some with J to work and some to my dad. Otherwise I would be spending the day in a sugar coma.

If Toblerone isn't really your thing then you have a problem. Just kidding. I was going to say if Toblerone isn't really your thing you could easily swap it for some other chocolate you prefer. I think Heath bars would work really well. Anything that you can chop up easily. I've been toying with the idea of swapping Almond Joys but I think a more solid chocolate is ideal.

Oh and don't worry, we didn't eat brownies for dinner. We're just catching up on leftovers so I thought I'd share this with you in the meantime!


Toblerone Brownies
adapted from "The Best Bake Sale Ever Cookbook"


1/2 cup (1 stick) unsalted butter, cut into pieces

2 oz unsweetened chocolate broken into pieces

2 eggs

1 cup sugar

1 teaspoon vanilla extract

1/2 cup plus 2 tablespoons all purpose flour

1/4 teaspoon baking powder

1/2 teaspoon ground cinnamon

1/4 teaspoon salt

1/2 cup chopped almonds

1 Toblerone bar


1. Preheat oven to 350. Spray or grease an 8x8 baking pan


2. In a small microwave proof bowl, heat the butter and unsweetened chocolate in 20 second intervals, stirring in between, until fully melted. About 1 minute total. Let cool.


3. In a large bowl or stand mixer, beat eggs about 2 minutes. Beat in sugar and vanilla. Beat in the cooled chocolate mixture. Blend in flour, baking powder, cinnamon and salt.


4. Chop up Toblerone into smaller bits. I chopped each pyramid into 3 pieces.


5. Spread the batter evenly in the greased pan. Bake in the center for about 30-40 minutes (Original recipe calls for 30 minutes but it took 40 in my oven) until a toothpick inserted in the center comes out clean. Set the pan on a wire rack to cool completely before cutting.